Build a ChatGPT LINE bot
Build a ChatGPT LINE bot⌗
In this tutorial, we will learn how to create a chatbot using the ChatGPT model from OpenAI, and deploy it on the LINE messaging platform using the Serverless Framework.
Prerequisites⌗
- An OpenAI API key
- A LINE developer account
- AWS CLI
- Serverless Framework
- Python 3.8 or later
Step 1: Create a new Serverless Service⌗
Create a new Serverless service using the Serverless Framework by running the following command:
sls create --template aws-python3 --path chatgpt-line-bot-serverless
This will create a new directory called chatgpt-line-bot-serverless with some boilerplate code in it.
Step 2: Set up the Environment Variables⌗
Create a .env.yml file in the project directory and add the following environment variables:
openaiKey: <OPENAI_API_KEY>
lineChannelSecret: <LINE_CHANNEL_SECRET>
lineChannelAccessToken: <LINE_CHANNEL_ACCESS_TOKEN>
Make sure to replace <OPENAI_API_KEY>, <LINE_CHANNEL_SECRET>, and <LINE_CHANNEL_ACCESS_TOKEN> with your own API keys and secrets.
Step 3: Install Dependencies⌗
To use OpenAI and LINE APIs in your Python code, you need to install their respective libraries. You can do this by running the following command:
cd chatgpt-line-bot-serverless
python3.8 -m venv ./venv
source ./venv/bin/activate
pip install openai line-bot-sdk
Also install serverless plugin.
npm init -y
npm install --save serverless-python-requirements
This will install the plugin that manages your Python dependencies.
Step 4: Write the Code⌗
Create a file named main.py in the chatgpt-line-bot-serverless directory.
This code creates a Lambda function that uses OpenAI’s GPT-3 model to generate responses to user messages. The code also handles LINE webhook events.
## -*- coding: utf-8 -*-
import os

import openai
from linebot import LineBotApi, WebhookHandler
from linebot.exceptions import InvalidSignatureError
from linebot.models import MessageEvent, TextMessage, TextSendMessage

OPENAI_KEY = os.environ['OPENAI_KEY']
LINE_CHANNEL_SECRET = os.environ['LINE_CHANNEL_SECRET']
LINE_CHANNEL_ACCESS_TOKEN = os.environ['LINE_CHANNEL_ACCESS_TOKEN']

line_bot_api = LineBotApi(LINE_CHANNEL_ACCESS_TOKEN)
handler = WebhookHandler(LINE_CHANNEL_SECRET)
openai.api_key = OPENAI_KEY
conversation = []


def lambda_handler(event, _):

    signature = event["headers"]["x-line-signature"]
    body = event['body']

    try:
        handler.handle(body, signature)
    except InvalidSignatureError:
        msg = "Invalid Signature"
        return {"statusCode": 400, "body": msg}

    return {"statusCode": 200, "body": "OK"}


def ask_chatgpt(q):

    question = {"role": "user", "content": q}
    conversation.append(question)

    completions = openai.ChatCompletion.create(
      model="gpt-3.5-turbo",
      messages=conversation
    )

    response = completions.choices[0].message.content
    answer = {"role": "assistant", "content": response}
    conversation.append(answer)

    return response


@handler.add(MessageEvent, message=(TextMessage))
def handling_message(event):
    replyToken = event.reply_token

    if isinstance(event.message, TextMessage):
        messages = event.message.text
        response = ask_chatgpt(messages)

        response_message = TextSendMessage(text=response)
        line_bot_api.reply_message(reply_token=replyToken, messages=response_message)
- The code starts by importing the necessary modules and setting up some global variables, including the LINE and OpenAI API credentials and a conversation history.
- The lambda_handler function is the main entry point for the serverless function. It listens for incoming HTTP requests from LINE and passes them on to the handler object, which is responsible for processing LINE events.
- The
ask_chatgptfunction sends a user’s message to the OpenAI API and generates a response. It then appends the user’s message and the response to the conversation history. - The
handling_messagefunction is called whenever a user sends a message to the bot. It extracts the message from the event object, passes it to the ask_chatgpt function to generate a response, and then sends that response back to the user via LINE.
Step 5: Deploy your bot⌗
This serverless.yml file is used to configure and deploy the Lambda function to AWS using the Serverless Framework.
service: chatgpt-line-bot-serverless

frameworkVersion: "3"

custom: ${file(./.env.yml)}

provider:
  name: aws
  runtime: python3.8
  environment:
    OPENAI_KEY: ${self:custom.openaiKey}
    LINE_CHANNEL_SECRET: ${self:custom.lineChannelSecret}
    LINE_CHANNEL_ACCESS_TOKEN: ${self:custom.lineChannelAccessToken}

functions:
  LineBot:
    timeout: 30
    handler: main.lambda_handler
    events:
      - http:
          path: /webhook
          method: POST

plugins:
  - serverless-python-requirements
service: specifies the name of the service. In this case, it ischatgpt-line-bot-serverless.frameworkVersion: specifies the version of the Serverless Framework to be used.custom: specifies any custom variables that are used in the file. In this case, it is reading the values from the.env.ymlfile.provider: specifies the name of the cloud provider and the runtime version. It also defines the environment variables to be used by the function.functions: specifies the function name, handler, timeout, and events. In this case, the function name isLineBot, the handler ismain.lambda_handler, the timeout is set to 30 seconds, and the function is triggered by an HTTP POST request to the/webhookpath.plugins: specifies the plugins used by the Serverless Framework. In this case, it is using theserverless-python-requirementsplugin to manage the Python dependencies.
Now, you can use the serverless framework to deploy your bot to AWS Lambda. You can do this by running the serverless deploy command from the command line.
After that, you’ll see something like this.
Deploying chatgpt-line-bot-serverless to stage dev (us-east-1)

✔ Service deployed to stack chatgpt-line-bot-serverless-dev (78s)

endpoint: POST - https://xxxxxxxx.execute-api.us-east-1.amazonaws.com/dev/webhook
functions:
  LineBot: chatgpt-line-bot-serverless-LineBot (3.5 MB)

Improve API performance – monitor it with the Serverless Console: run "serverless --console"
Put this URL into Webhook URL on LINE Developers Platform.
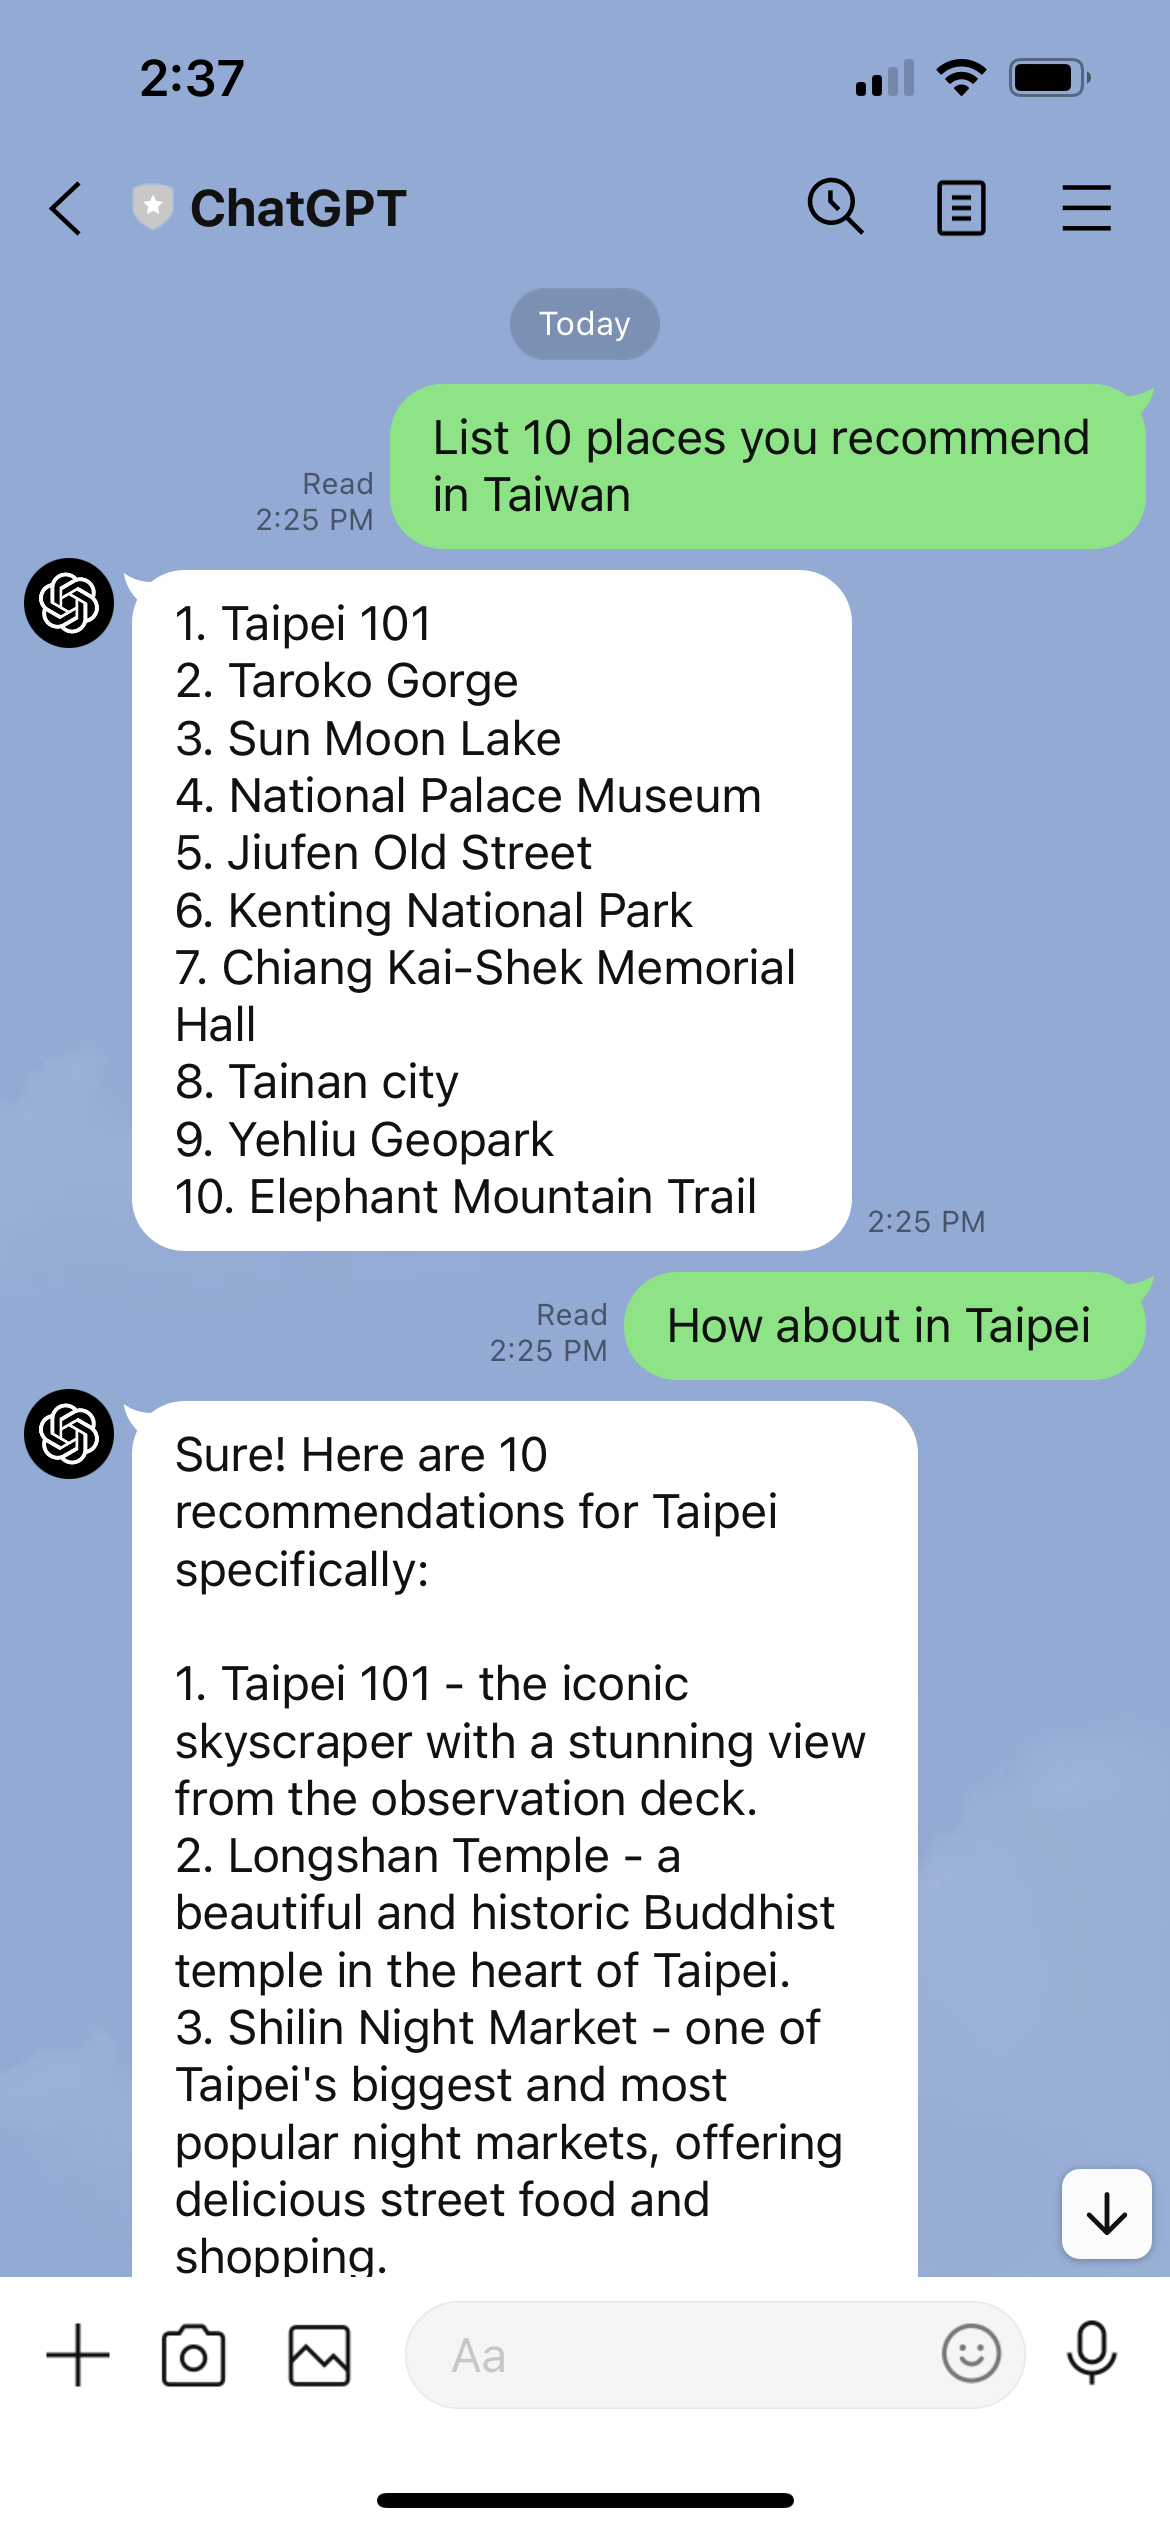
That’s it! Your ChatGPT bot should now be up and running on LINE, ready to answer users' questions and provide helpful responses.
Author’s Note⌗
This tutorial was written by ChatGPT.